Pages

Thursday, March 31, 2011

Make a Mix: Salsa Mix


A friend asked me a while ago if I had ever made salsa from THRIVE ingredients.  Well I had not. So I got to work.  I found a recipe in an old extension publication for Salsa Mix in a Jar.  I thought it was a good idea but I was not happy with the end product.  I experimented a little and came up with a recipe I like better. If you like the chunky style but want a spicier salsa try adding more mix with the can of Mexican tomatoes.   When making it is best if you make it and refrigerate it for a couple of hours or overnight before eating, it lets the flavors develop a little.


Salsa Mix in a Jar
1 teaspoon garlic powder (more to taste)
1/2 cup THRIVE freeze dried  onion
2 Tablespoons THRIVE dried mixed bell peppers
½ Cup THRIVE tomato powder
2 Tablespoons  dried red pepper flakes
1 tablespoon salt
1 tablespoon pepper

Measure all into jam jar or ziploc bag, seal & shake to combine.

Attach Tag
Mild Chunky Salsa
Combine the following, mix well: Chill 1 hour to let spices mingle.
2 tablespoons salsa mix
10 oz can Mexican-style tomatoes.


Spicy Salsa
½ cup salsa mix
¾ cup water
Combine Mix and water chill 2 hours. Serve with Chips/Crackers/Veggie Sticks.
 

Salsa Spread
2 tablespoons salsa mix
1. Chopped Tomatoes
1 cup softened cream cheese

Combine Mix, tomatoes, Cream Cheese, chill 2 hours. Serve with Chips/Crackers/Veggie Sticks.

Sunday, March 27, 2011

Make A Mix: French Breakfast Muffins and Muffin Link Party

photo source: www.familyfun.com

Several years ago I ran across this delightful recipe in Family Fun Magazine and have been making it ever since.  These muffins are the perfect Sunday morning breakfast food.  My kids say they are better then doughnuts.  I started making my own mix for these muffins after being late for church on multiple Sunday mornings because we were eating these muffins.  When I make this mix I line up 6 Ziploc bags, and add the flour to each bag and then I put the flour away, then I add the sugar to each bag continuing down the list of ingredients. This assembly line set up makes it easy to make a bunch at once.   Make sure to squeeze any extra air out of the bags.  Be sure to add cooking instructions to the bag.  I usually just write it on with a sharpie but you can also print out the recipe and tape it on.

Printable Recipe

French Breakfast Muffin Mix:
In a zip-lock bag add: 
2 cups flour
2/3 cup sugar
2 1/2 teaspoons baking powder
1/2 teaspoon salt
1/4 teaspoon nutmeg
1  tablespoon powdered eggs
3 Tablespoons powdered milk

To make the mix you need:
6 tablespoons unsalted butter, melted and slightly cooled
1 teaspoon vanilla extract 
1 cup water
For the Cinnamon-Sugar Topping
1/2 cup sugar
1/2 teaspoon cinnamon
2 tablespoons unsalted butter, melted and slightly cooled


Heat the oven to 375°. Butter the bottoms (only) of 12 standard-size muffin cups and set the pan aside. Add mix to a medium-size bowl, whisk together. In a separate bowl blend in the water,  melted butter, and vanilla extract. Make a well in the dry ingredients and pour in the liquid mixture. Using a wooden spoon, mix the batter just until it's evenly blended, then spoon it into the muffin cups, filling each about two-thirds full. Bake for 15 minutes. Cool enough to handle, about 5 minutes, then remove them from the cups.  Before the muffins lose their warmth, prepare the topping. Mix the sugar and the cinnamon in a small bowl. Melt the butter and transfer it to a separate small bowl. Set both bowls next to the muffins. Working one muffin at a time, quickly dip the tops in the melted butter and then in the cinnamon sugar, rolling each muffin in all directions to cover the entire top. If you'd like more topping, roll them in the cinnamon sugar for a second time while they're still warm. Serve immediately.  Makes 12 muffins.
 
Original Recipe: French Breakfast Muffins
Source: Family Fun Magazine

Muffins
 2 cups flour
2/3 cup sugar
2 1/2 teaspoons baking powder
1/2 teaspoon salt
1/4 teaspoon nutmeg
1  large egg
1 cup plus 2 tablespoons milk
6 tablespoons unsalted butter, melted and slightly cooled
1 teaspoon vanilla extract
Cinnamon-Sugar Topping
1/2 cup sugar
1/2 teaspoon cinnamon
2 tablespoons unsalted butter, melted and slightly cooled

Heat the oven to 375°. Butter the bottoms (only) of 12 standard-size muffin cups and set the pan aside. Measure the flour, sugar, baking powder, salt, and nutmeg into a large mixing bowl and combine them with a whisk. In a medium-size bowl, whisk the egg until it's frothy. Blend in the milk, melted butter, and vanilla extract. Make a well in the dry ingredients and pour in the liquid mixture. Using a wooden spoon, mix the batter just until it's evenly blended, then spoon it into the muffin cups, filling each about two-thirds full. Bake for 15 minutes. Cool enough to handle, about 5 minutes, then remove them from the cups.  Before the muffins lose their warmth, prepare the topping. Mix the sugar and the cinnamon in a small bowl. Melt the butter and transfer it to a separate small bowl. Set both bowls next to the muffins. Working one muffin at a time, quickly dip the tops in the melted butter and then in the cinnamon sugar, rolling each muffin in all directions to cover the entire top. If you'd like more topping, roll them in the cinnamon sugar for a second time while they're still warm. Serve immediately. Makes 12 muffins. 


Saturday, March 26, 2011

Make a Mix: Get Dinner on theTable Mix and Chicken Pot Pie


I have found that I use the same THRIVE freeze dried foods in the same porportions in most of my cooking.  To make cooking even easier I have made up some of my own mixes then when I am making dinner I don't have to measure just dump.

Here is what I do:

Get Dinner on the Table Mix
1/4 c freeze dried onion
1/4 cup freezed dried celery
1/4 cup dehydrated carrots

1 cup dehydrated potato chunks

Place all ingredients in a jam jar. Screw on lid tight.

To use:
Fill jar with hot water and let rehydrate or dump into what ever you are making.

For a printable jar label click here.

I use it for:
Chicken Pot Pie
Soup-chicken noodle, chowder, meatball, etc.
Casseroles

Remember Thrive freeze dried and dehydrated foods have no salt or other seasoning on them so be sure to add some salt and pepper.

Chicken Pot Pie
1 pie crust recipe prepared
1 jar of prepared  Get Dinner on the Table Mix,
1/2 cup freezed dried vegetables (like peas, green beans, what ever you like)
1/2 cup freeze dried Chicken
1 can cream of chicken soup, do not add the water

1.  Add jar of get Dinner on the Table Mix, freeze dried veg, and chicken to a large bowl, cover with hot water.  Let sit 10 minutes until vegetables are soft and rehydrated.
2. Drain off water until the ingredients are just covered.
3.  Stir in can of cream of chicken soup.
4.  Add all ingredints to pie shell. Cover with send pie crust, seal edges. Cut slits in the pie crust so the steam can escape.
5. Bake pie at 350 for 1 hour.

Friday, March 25, 2011

Make Your Own Mix: Apple Pie Filling and Pie Crust


So I heard today that pie is the new cupcake.  I am excited because I love pie.  This is my favorite pie dough recipe.  I find it is easy to work with and taste great.  If you prefer you can switch out the butter flavored Crisco for lard, butter or regular Crisco.  I like the butter flavored Crisco because it makes the crust a nice golden brown color and it gives the crust a slight butter taste.  I don't use butter very often because I have a hard time getting butter the right temperature. It is either to cold or it is to melted.  I really like lard for pie dough but I have a hard time finding a high quality lard on a regular basis. 

This recipe came from a homemaking class my mother attended years ago. I don't know who originally taught the class but I sure love the recipe.

In this pie dough recipe you are instructed to mix the fat into the flour with your fingers.  I love this method it makes great crust. If you are not sure you want to get your hands dirty it is fine to use your pasty blender or a food processor, just know that the dough will be harder to work with.

This apple pie filling recipe is one of my favorite mixes to have on hand.  I know it is not a mix in the traditional way of thinking but for me it is something I can do a head so there will be less work later.  So I count it as a mix.  Apple pie is wonderful to eat but often a little labor intensive for every day use.  Each fall we make a batch or two of this great filling.

Pie Tips

FOOD PROCESSOR PASTRY
This Method   is fast and efficient, but it’s speed needs to be treated with caution. Use 1-2 second pulses rather than letting the machine run. Have all fats ice cold or frozen. Combine the dry ingredients in the food processor; process for 10 seconds. Cut fat into ½” chunks and scatter over dry ingredients. Use pulse bursts until fat is the size of peas. Drizzle ice cold water over top. Pulse until dough begins to clump into small balls. If the dough adheres when squeezed, it is ready to use.

FREEZING
Baked Pie & Tart Shells:  Place on cookie sheet and freeze (don’t wrap). When frozen, wrap or place in freezer bags and return to the freezer. To use, unwrap and heat in moderate oven (375 degrees F.) for 10 minutes. May also thaw unwrapped at room temperature.

Unbaked Pie & Tart Shells:   Freeze dough in the pie pan. When solid, pry it out of pan and freeze. May stack with waxed paper crumpled between crusts for easier separation. Package in freezer bags anad return to freezer. For single crust, unwrap and bake in very hot oven (450 degrees F.) for 5 minutes. Prick crust with fork and continue baking until browned (apx. 15 minutes).  

Storage: The recommended storage time for unbaked pastry is two months. For baked pastry it is 4 to 6 months.


Pie Filling:  When fresh fruit is in season it is a great idea to make a little bit of pie filling to freeze and use later in the year.  My favorite pie filling to freeze is peach.  To freeze fresh pie filling: Line a pie pan with several layers of foil.  Fill with pie filing. Freeze until solid. Pop the frozed filling out the the pan and place in a Zip Lock bag or wrap well with foil.  Label and return to the freezer.  When ready to use make pie crust. Place frozen pie filling in pie crust and bake.


PIES TO FREEZE

Recommended Varieties:    Apple, peach,, blueberry, mince, strawberry, or rhubarb freeze well. Cherry pie may be frozen only after baking.

Unbaked:  Do not make slits in the top crust. After pies are frozen, cover with a second pie plate (protect from crushing). Wrap with moisture proof film and return to the freezer. Use within 2 months.

Baked:  Cool baked pies to room temperature. Wrap with moisture proof film and return to the freezer. Use within 4 months for highest quality.

Thawing:  If frozen unbaked, remove wrapping and make slits in top crust. Bake at 425 degrees F. for 10 minutes, cut vents in top, bake for 20 minutes longer. Reduce heat to 350 and bake until juices bubble and crust is golden brown. If frozen baked, remove wrapping and let thaw. Bake at 350 degrees F. until knife inserted comes out warm (apx. 15 minutes)

Recipe

Heather's Favorite Pie Dough
Makes enough mix to make 6 single pie crusts or 3 double pie crusts


In a shallow bowl place:
6 cups of flour
3 cups of Butter Flavor Crisco
3 tsp salt

Mix together with clean fingers until the mixture resembles corn meal. (At this point you can put the Mix in a zip lock bag or other air tight container and use store until you are ready to use it.)  Or you can use it right away.
Add 1 ½ cups water.  Fold together to form a soft ball of dough.  At this point the dough should look marbled. Divide into 6 sections.  Roll out one section into a large circle.  Hold pie pan over circle to make sure the dough is about 2 inches larger then the pie pan.  Place dough in pie pan. Fill with pie filling.  Roll out another circle and place on top.  Seal and crimp edges. I find it easiest to crimp the edges if you first tuck the dough that is hanging over the edge of the pie pan under so you have a mound of dough to crimp. 

Bake Unfilled Pie shells for 8-10 minutes at 350.
Bake filled double crust pies for 1 hour at 350.


Bottled Apple Pie  Filling--This really does set up into  a slice-able pie if you let it cool, we can never wait that long so it is a little runny looking in the photo.

Peal apples; slice and put into quart bottles, about 6 or 7.  Pour syrup over apple.

Syrup:
10 cups water
4-½ cup sugar
2 tsp cinnamon
1-cup cornstarch
¼ tsp nutmeg
1 tsp salt

Bring to a bubbling boil; add 3 tablespoons lemon juice plus 3 drops of yellow food coloring.

Seal and process 20 minutes.

Thursday, March 24, 2011

Shelf Reliance is Comming to Canada


Shelf Reliance Home Parties are coming to Canada!
For those of you in Canada this is an amazing opportunity.  If you have ever though of starting a  home based business or if you are interested in building your food storage.  Don't miss this great opportunity.  I am so excited and I'm not even in Canada.


Jason Norton, Seth Adams, and Jeremy Taeoalii will be in Calgary, Alberta Canada on April 7th for a pre-launch opportunity meeting! Please invite your friends and family in this area to participate in this very exciting event! The meeting will take place from 6:30pm-9:30pm.
Acclaim Hotel Calgary Airport
123 Freeport Boulevard N.E.
Calgary, Alberta T3N 0A3
Phone: 403.291.8000  
Toll-free 1.866.955.0008
http://www.acclaimhotel.ca

I would love to have the first consultants in Canada sign up on my team.  Let me know if you need any more info.

Wednesday, March 23, 2011

Shout Outs: Great Food Storage Mixs

There are some amazing food storage mixes out there in the blogosphere.  I thought I'd share some of my favorite.

Whole Grain Pancake Mix 

She grinds her own wheat, oats, brownrice, and white beans to make the flour for this panckae mix.  I love the extra protein and fiber this adds. 
Deals to Meals Whole Grain Pancake Mix


Copy Cat Stove Stop Stuffing Mix
We love stove top stuffing and we don't really like homemade.  I know most people are exactly the opposite.  I know that stuffing is really just dry bread and seasoning but for some reason I having gotten into making my own stuffing.  This recipe is perfect for us, it is the best of both worlds.  I get to make my own, and I get the stove top taste.
No Ordinary Homestead Make your own  Stove Top Stuffing


Homemade "Rice a Roni" Mix
This easy mix is appealing and tasty.  You can make it in a big batch and save time (at the grocery store) and money (it is super cheep to make).   It is an easy side dish.
Lynn's  Kitchen Adventures Homemade "Rice a Roni" Mix


Homemade Cake Mix
This is exactly what I am looking for in a cake mix.  A high quality delicious tasking cake with the convenience of a mix, that is easy and economical to make. 
I Am Baker Homemade Cake Mix


Potato Soup Mix 


This quick and easy mix makes a soup in just a few minutes. 
The Make Your Own Zone Potato Soup Mix


Make Your Own Soup Mix
This blog post includes several soup mix recipes including instant noodle soup, tomato soup, potato soup,  and dry onion soup, 
A Matter of Preparedness Make Your Own Soup Mix

Tuesday, March 22, 2011

Shelf Relaince's Growth


Shelf Reliance has doubled in size in the last month.  Wow that is amazing to me.  I love being a part of a company that is growing so quickly. Sadly this has lead to a bit of a backlog in shipping.  It is talking the shipping department a little longer then usual to get products shipped.  So please be patient. 

Sunday, March 20, 2011

Make Your Own Mix: Magic Mix and a Link Party


Making your own mixes is a great way to use your food storage, be in control of what goes into your food, and save money.  One of my favorite mixes is Magic Mix.  I know I have talked about this before but it is worth a repeat. I have been making Magic Mix for years.  It is an a recipe that the USU extension heavily promotes.  The original recipe is made with fresh butter and then must be refrigerated.  While I love the convenience of Magic Mix.  I do not love it taking up space in my fridge.  When I first heard that butter powder is shelf stable I thought this is the answer to my problem.  I having been making Magic Mix from THRIVE powdered butter ever since.  If you haven't tried powdered butter yet you can purchase it from my online store at:  http://homeparties.shelfreliance.com.  You might want to check out my other popular post on powdered butter 

If you are already familiar with magic mix make sure you scroll down to the new uses that I have added:  including Alfredo, vanilla pudding, pumpkin custard and microwave directions.  


For printable recipe click here: Magic Mix Using Powdered Butter
Magic Mix
2 cups NON-INSTANT milk powder OR 4 cups instant nonfat dry milk
1 cup THRIVE butter powder
1 cup flour or 1/2 cup cornstarch

Put all items in a large lidded container and whisk to combine. Store in pantry no need to refrigerate.

 To Make a White Sauce: 
Combine ½ cup Magic Mix and 1 cup water in saucepan. Cook over medium heat, stirring constantly, until sauce is thickened and simmering. Makes 1 cup.

To Make Gravy:
Combine ½ cup Magic Mix and 1 cup meat dripping in saucepan. Cook over
medium heat, stirring constantly, until sauce is thickened and simmering. Makes 1 cup.
If you do not have meat driping use was 1 cup of broth or 1 cup water and 1 tsp boulion. 
To Make CREAM OF CHICKEN Soup:
Combine 1 cup of Magic Mix with 1 ¼ cups of cold water and 1 tsp chicken bullion in saucepan.  Cook and stir until thickened. Add to casserole as you would the canned product. Substitute for 1 can.

To Make CREAM OF MUSHROOM Soup:
Combine 1 cup Magic Mix with 1 1/4 cups cold water.  Cook and stir until thickened. Add 1/4 cup freeze dried mushrooms. And allow to rehydrate in the soup.  Substitute for 1 can cream of mushroom soup.


To Make Alfredo:
Combine 1 cup Magic Mix and 2 cup water in saucepan. Cook over medium heat, stirring constantly, until sauce is thickened and simmering, remove from heat. Add 8 ounces cream cheese cut into chunks.  Stir until cream cheese is melted.  Add 3/4 cup  Parmesan cheese, and 1 teaspoon garlic powder.  Stir until combined. Serve over cooked fettuccine noodles.


Magic Mix Chocolate Pudding
1/2 C. Sugar
1 C. Magic Mix
2-3 T. Cocoa (optional)
2 C. Water
1 t. Vanilla
Combine Magic Mix, sugar and cocoa in saucepan and mix well. Add water, stir over medium heat until pudding bubbles. Add vanilla and beat. Cover and cool.

Magic Mix Vanilla Pudding--from the  Washington State Extension
Makes 4 servings, about 1/2 cup each
1 cup Magic Mix
1/3 cup sugar
11/2 cups water
1 tablespoon soft tub-type margarine (I leave this out)
1 teaspoon vanilla
In small saucepan with heavy bottom, combine Magic Mix and sugar. Stir in water. Add margarine. Cook over medium heat, stirring constantly with a heat resistant spatula or wooden spoon. Cook until it starts to get thick like applesauce. This may take 10–12 minutes.  Remove from heat. Stir in vanilla. Pour into a storage bowl or 4 individual serving dishes. Cover with plastic wrap to prevent a dry film from forming on top.  Refrigerate. Pudding will thicken more as it cools.


Magic Pumpkin Custard  from the  Washington State Extension
This is a lot like pumpkin pie with out the crust.
Makes 8 servings
1 cup Magic Mix
2/3 cup brown or white sugar
11/2 teaspoons cinnamon, or pumpkin pie spice
1/4 teaspoon salt
1 cup water
16 oz. can pumpkin, or 2 cups canned or cooked
2 eggs, beaten with a fork
Combine Magic Mix, sugar, spice, and salt in large bowl. Stir in water. Add pumpkin and eggs. Stir to combine well. Pour into a greased 9-inch pie plate. Bake at 350˚F for 45 to 55 minutes or until a knife inserted 1 inch from the center comes out clean.

Magic Mix Microwave Directions:   I often make my magic mix in the microwave.  Here is what I do.
Mix ingredients in a microwave-safe 11/2 quart or larger bowl. . Microwave on high for 1 minute, and then stir. Repeat 4–5 times until pudding (or white sauce, or gravy) is thick.


Saturday, March 19, 2011

10 Minutes till Dinner: Minestrone Soup


One of the things that I love about THRIVE freeze dried foods is how easy it makes my life. The veggies, are all washed pealed and chopped for me. It really helps me get dinner on the table fast. Over the next few days I am going to post some of my favorite recipes that can be made in part a head of time I am calling this series 10 minutes till dinner.  These are dishes that on a busy night you can get on the table fast.

For this recipe I usually make place all of the ingredients in a glass canning jar or zip lock bag. I make up a few at a time and then attach cooking instructions. Then when I need a super quick meal. I make it up. Fast easy and nutritious. One thing that I have found to be very helpful is to use a canning funnel to fill the jars.  If you are a canner you probably already have one if not you can find them of the canning section of any store.  The funnel fits perfectly inside the jar so you don't spill anything.


Minestrone Soup:
1/4 cup all veggies - corn, celery, onions, green beans, peas, carrots and green peppers.
4 T. tomato powder
1/2 t. Italian spices
1 teaspoon parsley
1 can beef broth
1 T. beef bouillon
6 cups water
1/2 cup pasta

Place everything in a soup pot. Bring to a boil. Lower heat to simmer. Cook 10 minutes, or until pasta is cooked.

Minestrone Soup in a Jar
Place the following ingredients in a canning jar
1/4 cup of the following dry vegetables: corn, celery, onions, green beans, peas, carrots and green peppers.
4 T. tomato powder
1/2 t. Italian spices
1 teaspoon parsley
1 T. beef bouillon
1/2 cup pasta

Add label to jar:

To cook add contents of jar and 6 cups water. Bring to a boil. Lower heat to simmer. Cook 10 minutes, or until pasta is cooked.

Labels and Instructions can be found here 

The labels I use are ones I found at http://itsacraftylife.blogspot.com/2010/12/ready-to-go.html
 They can be customized on your computer to say what ever you want.  I use them for everything.

Wednesday, March 16, 2011

The Top Ten Reasons Why Being A Shelf Reliance Consultant is Great

Did I mention that the food is GREAT and free of preservatives?

When ever I watch the tonight show I always look forward to the top ten list.  So I thought I would make my own, about being a Shelf Reliance Consultant.  I am not funny, but I am informative. 

Top 10 reasons being a Shelf Reliance Consultant is Great 

1)  Commission:  Shelf Reliance Consultants Make money. 
You get paid commission on everything you buy (except your Q), everything sold at parties, everything sold on your consultant website, everthing a customer buys from shelfreliance.com, all your Q customers. Commission is 10% of ordeon every single order you take, even your own! Which means we get everything at a really great price! Most parties average about $800+ which means you take home from $80+ per party. 

2) Consultants get the host benefits for any order they take that is not made at a party. Which is amazing!!! Host Benefits are 10% of the party order in Free product and there are 2 ways to get product for 50% off. This is my most favorite benefit.  I originally signed up as a consultant in order to get my food storage at a discount.  I had no idea how much food I would be able to get for free or half off.  If you are serious about food storage this is a great benefit.  Consultants also get supplies for you party (or your home) at a supper discounted rate through the Party Supply Benefit!

3) You receive a $50.00 bonus for every consultant you sign up. 

4) Consultants don't need to keep an inventory.  Shelf Reliance ships directly to the customer via FED EX.  We even ship to APOs Alaska and Hawaii.

5) Consultants never get dumped out of the system no matter how low your sales as long as your Q is active

6) Consultants get paid commission every single month for every customer you have on the Q. This is magic!!! It’s commission without doing any parties. After a while you can make money without giving any parties or just a few.

7) Consultants can print price lists and order forms online for free! You don’t have to buy party supply from Shelf Reliance, you can do what you like.

8) I am your trainer! I will get you set up and off to a great start. 

9) This is an established company that has just entered the home party market.  There is tons of potential for growth. It is not very often that you have the opportunity to get in at the ground floor of such a great company. 

10) You get to work with great people.

When you sign up during March you receive a box of my favorite foods (Strawberries, Chicken, Taco TVP, Brownies, and Macaroons) for FREE! It is a great way to jump start your business or personal food storage.

If you are interested, email heather@teamshelfreliance.com and I'll tell you how to sign up. It only takes a few minutes.

A Green Dinner for Saint Patricks Day


Vegetable Risotto Serves 4
1 Tbsp Olive oil
2 cloves garlic, minced

2 Tablespoons FD onions 
1 cup rice
4 cup water
1 Tablespoon instant chicken bouillon
1 cup Freeze Dried broccoli
1 cup Freeze Dried Peas
1/2 cup Freeze Dried Spinach
2 Tablespoons Dehydrated Carrots

1 c. chopped tomato (Roma is best)
¾ cup shredded cheddar cheese
3 Tbsp grated Parmesan cheese
1 tbsp basil or parsley

In large saucepan cook the garlic in oil until tender.  Add water and bouillon and stir to dissolve.  Add rice, and freeze dried vegetables and cook covered for 15 minutes, untill rice is tender.  Stir in tomato cheese, and basil or parsley.  Serve immediately.

Variation:  I love to use Feta cheese in this instead of the shredded cheddar.

Irish Soda Bread--Food Storage Link Party


Saint Patrick's Day is tomorrow.  If you are looking for something festive to eat try this Irish Soda Bread.  
So I have found that I really love buttermilk in cooking.  Yet it is one of those ingredients that I just don't always have.  A year or so ago my Mom told me she was per-measruing and freezing buttermilk. Then when you are ready to use it you defrost it and add it in to your recipes.  I have been doing it ever since and LOVE it.  

Butter Milk Trick

Buttermilk
Papercups that will hold 1 cup each with pleanty of headspace
Cookies Sheet

1.  1 cup of buttermilk and pour it into a paper cup.  The cup should have several centimeters of headspace (remember liquids expand when they freeze)  Place paper cup on cookies sheet.  Repeat until all of the butter milk is in paper cups. 
2. Carefully place cookies sheet in freezer.  Freeze until firm.  
3. Remove from freezer and place paper cups in a Zip Lock Gallon Bag. Return to freezer. 

When ready to use remove from freezer and defrost on the counter or in the microwave.  It it has been in the freezer for a while you need to add a little bit of water to equal 1 cup. 

Easy Irish Soda Bread
recipe source:  http://theirishmother.blogspot.com/2011/02/easy-irish-soda-bread-and-irish.html
3 3/4 cups flour
1/4 cup white sugar
1 tablespoon baking powder
1 teaspoon baking soda
1/2 teaspoon salt
1/2 cup melted butter
1 cup buttermilk
1 egg, slightly beaten

Preheat oven to 375 degrees.  Either grease a cookie sheet, or place a piece of parchment paper on it.
In a large bowl, mix together flour, sugar, baking power, baking soda and salt.  Pour in melted butter, buttermilk and egg and stir together JUST until it comes together.  Do not overbeat, or it will give it a tough crumb.
Turn dough onto a floured board and knead lightly, just 3 or 4 folds.  Form dough into a round and place on prepared baking sheet.
In a small bowl, mix together 2 tablespoons melted butter and 2 tablespoons cream.  Brush loaf with this mixture, sprinkle with sugar and using a sharp knife, cut and X into the top of the loaf.
Bake in a preheated oven 40 - 50 minutes, or until a toothpick inserted into center of loaf comes out clean.

Link Party

Tuesday, March 15, 2011

Storing Seasonings: Fresh Herbs


I have grown herbs in my own garden for several years, with varied levels of success.    The only problem is  I have gotten used to using fresh but I am not happy to pay the exorbitant price for fresh in the winter.   So this winter I decided to grow a few herbs in my kitchen window.  I checked out my options and decided I had room for three herbs.  I decided on basil, parsley, and rosemary.  I purchased inexpensive pots and seeds and have been growing them since January.

It has been much easier then I thought.  The herbs have done very well and I have enjoyed growing them.  If you live in a cold norther area like I do you might want to think about having a pot of herbs somewhere in your kitchen. It is a great was to add something tasty to your food storage.

72 hour kit update--Get a Kit, Make a Plan, Be Informed


I like to update my 72 hour kit every 6 months or so.  I usually do it the first weekend in April and October, but as I have been watching the devastation in Japan, I decided to make sure my kit is up to date.  

There are lots of lists out there to help you design a kit.  Shelf Reliance has an online tool  called the emergency kit planner.  It is a free tool to help you plan your 72 hour kit.  You can find it here. 

I generally use the American Red Cross emergency kit list.   You can find it here.  Red Cross Get A Kit The Red Cross recommends that Americas, "get a kit, make a plan, be informed"  I love this idea.  I think it encompass exactly what we need to do to be prepared for an emergency.

As I have been going through our kits over the last few days, I have found a few things that I needed to add, but over all it made me feel like we were ready.  I hope we never have to use them, but if we did I think we would have the things we need.

So what did we add?  Our 72 hour kit Updates:
Family Emergency Plan-  I made to go in our 72 hour kits.  We have one for each of our extended families.  One of the thing I think is most important is to have a family out of state contact.  Often in an emergency it is difficult to make local calls, but possible to make out of state calls.  Our family had decide on one person that is out of state that we will all call. This person will then relay any information that he has received and help coordinate our family.

Medication- My son has asthma and has several medications to help control it.  As I have been thinking about our 72 hour kit I decided his inhaler is something I do not want to be with out in an emergency.  I called the doctor and explained why I wanted a second inhaler and she wrote up a prescription.  Easy.  

Baby Sling--I have used a sling to carry each of my babies.  When I was watching some of the video from the disaster in Japan. I saw this woman

walking through utter destruction carrying a child in a traditional baby sling.  This is a case where you would never be able to push a stroller and might need your hands for other things.   This photo prompted me to add a sling to my 72 hour kit.  I have two different types of slings.  Slings are simple to make if you sew.  If not check out my friend Kim's Etsy store.  When my youngest was born she made me the most beautiful sling.  I have loved it.  It holds the baby securely, it is easy to use, and even has a pocket.
photo from: prairie-mama.blogspot.com

 
The sling I am adding to my kit is a simple one I made a few years ago.  It is a pouch sling.  You can find the pattern here http://www.sleepingbaby.net/jan/Baby/

For more info on babywearing: Kim has written a bit about babywearing on her blog.  
Here is a link to how to safely wear a baby - http://prairie-mama.blogspot.com/2010/03/be-safe-not-sorry.html
Here is one about different ways to wear a baby - http://prairie-mama.blogspot.com/2009/06/what-im-wearing-besides-baby.html
And another about different babywearing options - http://prairie-mama.blogspot.com/2008/11/international-babywearing-week.html

Monday, March 14, 2011

GMO Free

 Shelf Reliance has published their updated GMO and Allergies report and....

ALL THRIVE VEGGIES ARE GMO FRE
ALL THRIVE FRUITS ARE GMO FREE
ALL GRAINS ARE GMO FREE (except for instant rice)
ALL MEATS ARE GMO FREE

OF OUR 105 PRODUCTS, 80 ARE GMO FREE!

AS YOU KNOW SHELF RELIANCE IS ALWAYS SOURCING THE BEST PRODUCT FOR OUR CUSTOMERS!

If you would like to see the full updated Allergen report,  you can find it here.

These are our products that contain GMO:
Instant Rice
All the TVPs
Baking Soda
Beef and Chicken Bouillon
Shortening Powder
Brownies and Macaroons
Entrees
 
What is the big deal about GMO? And what is GMO anyway?
According to Wikipedia : A genetically modified organism (GMO) or genetically engineered organism (GEO) is an organismgenetic material has been altered using genetic engineering techniques...  Critics have objected to GM foods on several grounds, including safety issues,[7] ecologicaleconomic concerns raised by the fact that these organisms are subject to intellectual property concerns, and law.


Thursday, March 10, 2011

Storing Seasonings: Dry Spices

photo from: http://spicesnherbs.net/product.html

Spices are a vavulable part of your food storage.  Yet stroing spice for the long term is tricky.  Most spices don't store that long.  Here are some general guidelines.

Shelf Life of Whole Spices and Herbs
Leaves and flowers — 1 year
Seeds and barks — over 2 years
Roots — over 2 years

Shelf Life of Ground Spices and Herbs
Leaves — 6 months
Seeds and barks — 6 months
Roots — 1 year

How can you tell if they are still good?
Smell them. If they still smell like cinamon (or what ever) then it is still good to use.  If it smells like nothing well then it will taste like nothing. 

There are things you can do to extend the shelf life of spices.
1.  Proper Storage: Spices should be stored in a cool, dark, airtight container.  If you are storing them in clear bottles next to your stove then you can plan on them not lasting very long.  As air and light reach spices the flavor deteriorates. I store a small amount of spices in my kitchen and then store larger containers in my cold storage.  I have found that keeping them in a dark cold place extends the life significantly.

2.  Buy in bulk for value but buy small quantities. Whole Foods Markets are very good sources for bulk herbs and spices, but check around.  I have found that my local coffe shop sells spices in bulk.  Remember that, bulk does not necessarily mean large quantities. Most prepackaged products are charging a premium for the packaging.  I try to have on hand the amount of spices that my famiy will use in a year.  Remember to plan for spices you will use in home canning.  Many of us plan on using the food we will harvest from our gardens and fruit trees as part of our food storage, yet in order to process those foods we often need spices or other seasoning (as well as pectin, lids, and equipment, but that is a topic for another day)

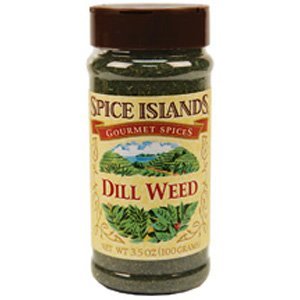
3. Buy quality spices to begin with.  I am cheep.  I will say it I have a hard time buying the premium anything.  The no-name brand is almost always good enough for me.  But I have found with spices (if I am not buying them in bulk) that the brand name does matter.  I have had good luck with the Spice Island brand. 
photo from amazon.com

Spices I commonly used in home canning recipes:
Cinnamon  used in  apple sauce,
Mustard seed  used in pickeling
Tumerac for mustard pickles,
Cumin for salsa,
Dill seed for pickles. 


The spices I keep on hand for daily use in quantities that will last me about a year:

Salt
Black Pepper
Seasoning Salt
Garlic
Cinnamon

Chili Powder
Lemon Pepper
Chives
Cumin
Dill
Rosemary
Basil
Nutmeg
Thyme
Paprika


Toasting or Dry Roasting:  Use for whole spices
Dry roasting helps to accentuate the taste of whole spices; as cumin, coriander, mustard seeds, fennel seeds, poppy seeds and sesame seeds, although I have found it to be useful with most spices. To toast, heat a dry heavy skillet over medium heat until hot. Add spice(s); toast 30 seconds to 2 minutes or until spices are fragrant and lightly browned, stirring constantly to prevent burning. Remove from heat. Be very careful if you burn them there is no way to save them.   Toast only the amount you will be using immediately.

Blooming Spices: Use for powdered spices
When using ground spices, add them to hot oil or butter to intensify their flavor. If sautéing aromatics, such as onions, garlic, or celery, add them to the pan during this time. This is particularly effective when using spice mixes, like curry or chili powders.

Wednesday, March 9, 2011

Rainbow Pudding-Perfect for Saint Patrick's Day


Every March I get a craving for Irish food.  I love to eat new potatoes, corned beef and cabage.  Sadly my famiy does not. This year I am trying to start some new Saint Patricks Day traditions, with food my family will eat.  I started with the desert. Are you suprised? 

A few months ago I saw online a very cute cupcake made into rainbow stripes by dividing the batter into seperate bowls and then adding food coloring to each to made a different stripe in the rainbow.  I loved the idea and made a rainbow cake with my daughter.  It was a hit.  So I decided to try it with pudding.  It worked great.  A couple of tips. 

  1. To make the stripes stand out you need a significant amount of pudding for each color.  I used 2 packets of instant pudding and it made 5 LARGE servings.  
  2. The type of food coloring you use matters.  I have found that the GEL food coloring works the best.  I found it at the local Grocery Store.  I used Betty Crocker Classic Gel Food Colors, and they worked great. (thanks to BettyCrocker.com for the photo)
  3. I found that having 7 bowls to wash when I was finished did not make me happy, so when I make this I use large paper cups to mix the pudding and the food coloring together in. 
Rainbow Pudding Recipe:  (This is so easy I feel kind of silly posting it)
2 boxes vanilla or other white instant pudding mix
milk, the amount called for on the box of pudding
Gel Food Coloring
Paper Cups

1.  In large mixing bowl combine instant pudding mix and milk, following the manufacturers instructions to make pudding. 
2.  Diving pudding evenly into seven large paper cups
3.  In each cup place a different color of food coloring. Red, yellow, orange (yellow + red) , green (yellow + blue), blue, and purple (red + blue).  Stir well.  Adjust food coloring as necessary.
4. Spoon into clear cups or serving dishes in reverse rainbow order.
5. Chill and serve.

Sunday, March 6, 2011

Lime Chicken Tacos--Food Storage Dinner Link Party


This is one of my family's favorite recipes.  I love how easy it is.  I love how good it tastes.  I adapted this recipe from one I got from Teressa Hunsaker, the USU extension agent in Weber County UT.  I usually serve these with black beans.   I LOVE the new THRIVE instant black beans.  So easy to use, so fast to cook, only a dollar more a can (to have dry beans, without soaking and long cook times is worth a dollar to me).

LIME CHICKEN TACOS

2 cups THRIVE freeze dried Chicken
2 cup water (to rehydrate the chicken)
3 tablespoons lime juice
1 tablespoon chili powder
1 cup Freeze Dried corn (rehydrate in 1 cup water for about 10 minutes)
1 cup chunky salsa

Place chicken and water in a 3-quart slow-cooker. Combine lime juice and chili powder; pour over chicken. Cover and cook on low for 5-6 hours or until tender. Remove chicken; cool slightly. Stir in corn and salsa.  If desired,  freeze in airtight container.

      To serve:
      THRIVE Instant Black Beans, cooked (directions are below)
      12 6-inch flour tortillas
      THRIVE Sour cream, prepared (directions are below)
      Shredded cheddar cheese
      Shredded lettuce
      Chopped tomatoes

Thaw chicken mixture and heat until heated through. Serve on tortillas with sour cream, cheese, lettuce and chopped tomatoes.

How To Cook Instant Beans: 

Bring 6 cups of water to a boil and add 2 cups beans. cover and simmer for 10 to 15 minutes Strain and rinse if desired.  Season with salt and pepper to taste.

How To Make Up Sour Cream Powder:

Place 1/2 cup HOT water in a medium sized bowl.  Wisk in 1 cup sour cream powder. Stir until thick and creamy.  For thinner sour cream add more water. 


How Much Do Shelf Reliance Consultants Make?


I thought it might be helpful to many of my readers to know how much I made approximately at when I was at each level. I have added what I made under each heading. As you can see my numbers are slightly higher than the numbers published by Corporate Shelf Reliance, I think that is because I have an awesome team.
 I often get asked how much Shelf Reliance Consultants make. Here is my best answer.

Shelf Reliance consultants are independent and can work as little or as much as they want. Whatever fits their life and desire.  What a consultant makes is directly tied to how much work they are willing to do.  This is a real business that takes real work.  But when a consultant works hard the possible income is limitless.  There are no sale or party quotas.  When a consultant signs up she/he pays a $200.00 kit fee.  The kit contains business supplies, and food supplies. A consultant is also required to have an active THRIVE Q set for $50.00 in product.

Shelf Reliance is a multi-level marketing company. The levels are consultant, mentor, director, executive, silver executive, gold executive, and platinum executive.

The following information is based off of the February 2011 company numbers.  As the company grows these numbers will go up.   The average party is around $900.00 so if a consultant has 4 average parties they are at the mentor level. 


How Much Do Shelf Reliance 
Consultants Make per Party? 

I was recently asked how much money I make per party. 
Let’s take a look

The average party take me about 4 house of work. 
My average party sales are about $1,500, which is slightly higher than the company average but I feel like it accurately represents what experienced consultants are doing.  

Consultants earn 10% commission off of party sales.  So I earn $150.00 in commission.

 At each party I figure that I spend about $15.00 in samples, literature, and other expenses. 

Making my take home $135.00 per party or $33.00 per hour.  I am pretty happy with that.  

A personal note, I have been a consultant for about 18 months and I am now making more money than I made when I was teaching school full time, but I think pretty darn good for a stay at home mom who is doing it part time.   I'm not a superstar salesman but I work hard.


How Much Do Shelf Reliance Consultant Make?  
The Breakdown by Rank

As a Consultant the average commission is $60 a month. 
This would pay for your Q which in essence mean you are getting your food storage for "free". Or at least the cost of your time to do about one party a month. This is good in that you are not subtracting from the household budget while accumulating your food storage.

As a consultant I made a wide range of commissions, my first month I made $25.70.  I was the rank of consultant for several month with the last month I was a consultant I made about $200.00 in commission.  I think that this is a pretty common situation.  It takes a while to get parties set up and your business rolling. 

As a Mentor the average check is $400. 
This is significantly more than $60 and the sooner you can hit this rank the better because you also receive corporate leads when you hit mentor. An extra $400 coming in can make the difference a lot of us are looking for.
As a mentor I made about $500.00 in commission a month

As a Director the average check is $800.  
As a director I made about $550.00 in commission a month

As an Executive Director the average commission check is $1000. 
This is nearly a house payment a car payment and groceries. This is the extra fun stuff you want but don't want to purchase with your spouse's hard earned money.
As an executive I made about $1,300.00 in commission a month

As a Silver Executive the average check is $2000.
Update Added July 8, 2011:  As a silver executive I make about $2050.00 in commission each month. I hit Silver Executive after being a consultant for 14 months.   

As a Gold Executive the average commission in a month is $3000. Here you are replacing income. 
Added October 27, 2011:  As a Gold Executive I make about $2,800.00 a month.   I hit gold executive after being a consultant for 19 months.  

As a Platinum Executive the average commission in a month is $6000! 
And this number will only get bigger as your team grows.
I hit Platinum Executive for the first time in November of 2012. That month I made $6,253.31 in commission.   

** additions in red added October 27, 2011
**additions in green added May 11,2011 
**additions in orange added  July 8, 2011
**additions in purple added Feb 5th, 2013


How Do I Sign Up To Be A Consultant? 

Signing up to be a consultant is an easy process.  It is all done on line and it only take 15 minutes.  

Please think carefully about the consultant you sign up under, as this person becomes your trainer and support system.   Check out how I support my team.  

If you are interested in finding out more about how you can become a Shelf Reliance Consultant check out these blog posts:

Sing Up to Be A Shelf Reliance Consultant 
The Shelf Reliance Compensation Plan 
FAQ's about becoming a Shelf Reliance Consultant 

Or please contact me at heather@teamshelfreliance.com