Showing posts with label sausage. Show all posts

Sunday, January 4, 2015

Heather's Zuppa Toscana Meal in a Jar


I love to go out to eat.  There I said it. I really do.  I especially love the Olive Garden. 

I was talking about my love of the Olive Garden with my friend Amy and she told me that her husband refuses to eat there.  His reason?  “I can eat pasta at home for a quarter of the price” 

I got to thinking and he is right, but I still love to eat there.  Over the years I’ve found and converted several Olive Garden Recipes to be made at home.  One of my favorites is the Zuppa Toscana soup.  Even better, this recipe works great for a meal-in-a-jar, so I can have amazing soup with my only effort being boiling water and stirring occasionally. 


Recipe Notes:


  • Heads up, because this soup uses spinach instead of kale (no freeze dried kale, its sad I know) the soup turns a little green.   It is still delicious; just a little green. 
  • I usually leave out the crushed red pepper flakes.  My kids a unlikely to eat anything that has them in so I leave them out.  The adults season individual servings at the table. 
  • My friend Mandi recently made this and suggested replacing 1 cup of water with 1 cup of heavy whipping cream.  I think that sound heavenly.   
  • If you choose to add the precooked bacon in this meal in a jar remember that it shortens the shelf life to ~1 year.  If you’d like it to last longer then leave the bacon out and add it when cooking.  Yes you could use bacon TVP, but it's not my favorite so I haven't tried it.  
  •  I buy the Hormel brand precooked bacon at Sam’s club.

Heather's Zuppa Toscana Meal in a Jar


Yield: 4-6 servings.  
Estimated Shelf Life:  With bacon:  1 year.   Without Bacon 5 years. 

1/2 cup THRIVE Freeze Dried Sausage
½ cup THRIVE Freeze Dried Onion
1 cup THRIVE Freeze Dried Spinach
2 teaspoons red pepper flakes (optional **these are super spicy.  If you don't like the soup super spicy then leave it out.  Did I mention SUPER SPICY?)
¾ teaspoon garlic powder
¼ cup crumbled bacon pieces
¼ cup THRIVE Veloute sauce mix

Jar Directions:  Layer ingredients in a wide mouthed, quart-sized jar, shaking the dry powder ingredients into the bulkier items. Top with an oxygen packet (300 cc) for longer-term storage, or seal with a food saver.  Cover with a new canning lid and hand-tighten the metal ring. 

To make:  Add ingredients to 8 cups of water. Simmer 20 minutes until the potatoes are soft.


A note on Food Safety:
The Meal-in-a-Jar method is a form of Dry Pack Canning.   The food inside the jars is preserved because the food is free of moisture and oxygen, the lack of which inhibits bacterial growth.  Jars should be stored in a dark environment to prevent any nutritional degradation due to light.  
When packing your jars remember to always 
  • Sanitize all equipment before use. Be sure to dry all equipment thoroughly before using.
  • Wash hands and or wear food handler’s gloves.
  • Keep work area clean and dry. 
  • Use either method 1 or method 2 to remove the oxygen from your jar.


Printables:


Interested in Learning More about Making Meals in a Jar?  Join my meal in a jar Facebook group.

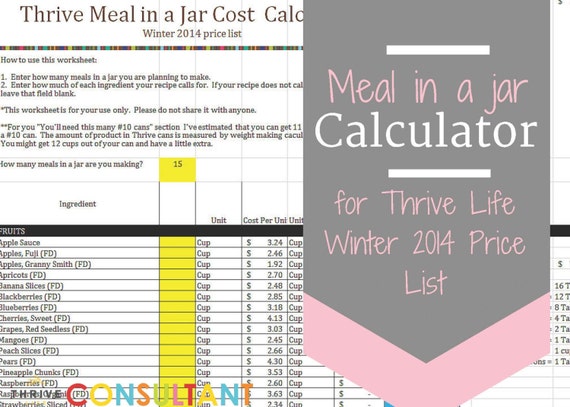
If you love making Meals in a Jar with Thrive food check out my Meal in a Jar calculator on Etsy. 


Wednesday, July 20, 2011

Biscuits and Gravy Food Storage Style

Have you tried the Thrive freeze dried meat yet?  I am in love with the sausage.  Okay well I always love sausage, but this sausage is precooked and shelf stable. So I can have sausage in anything in just a few minutes. No more running to the store to get sausage, no more splattered kitchen. I've been using the freeze dried sausage for a while now and we recently decided to give it the biscuit and gravy test.  It turned out wonderful!  I might never buy fresh sausage again.  

Tips: 
Start re-hydrating the sausage before you start the biscuits. It will be ready to make into gravy by the time the biscuits are in the oven. 
 The gravy recipe has a range of sausage in it. That is because my husband and I can't decide on how much sausage should be in it.  I think it is gravy with sausage, he thinks it is sausage with gravy.  So measure accordingly.

Buttermilk Biscuits
Print
 
2 cups (10 ounces) unbleached all-purpose flour
2 teaspoons baking powder
1/2 teaspoon baking soda
1 teaspoon sugar
3/4 teaspoon table salt
1 cup cold buttermilk
8 tablespoons unsalted butter, melted and cooled slightly (about 5 minutes), plus 2 tablespoons melted butter for brushing biscuits

1. Adjust oven rack to middle position and heat oven to 475°F. Whisk flour, baking powder, baking soda, sugar, and salt in large bowl. Combine buttermilk and 8 tablespoons melted butter in medium bowl, stirring until butter forms small clumps.

2. Add buttermilk mixture to dry ingredients and stir with rubber spatula until just incorporated and batter pulls away from sides of bowl. Using greased 1/4-cup dry measure, scoop level amount of batter and drop onto parchment-lined rimmed baking sheet (biscuits should measure about 2 1/4 inches in diameter and 1 1/4 inches high). Repeat with remaining batter, spacing biscuits about 1 1/2 inches apart. Bake until tops are golden brown and crisp, 12 to 14 minutes.

3. Brush biscuit tops with remaining 2 tablespoons melted butter. Transfer to wire rack and let cool 5 minutes before serving.


Sausage Gravy
2 1/2 cups water  (save excess water in cup after re-hydration is complete)
1 1/2 cup to 2 1/2 cups sausage

1/4 cup vegetable oil
3/4 cup flour
1 1/2 cup milk
1 Tablespoon salt
2 teaspoons pepper
1 cup reserved water

1. To rehydrate sausage place sausage and water in a large skillet (the pan you want to make the gravy in).  Heat over medium heat to rehydrate. About 5 minutes. 

2. Remove from heat and drain excess water into cup.

3. Cook sausage for a minute to dry it (water makes the gravy clump) add oil and cook for another minute.  Add flour, stir and heat over low heat until the oil and flour form a roux.

4. Add milk, reserved water, salt and pepper.  Cook over medium heat until thick and bubbly.  Additional water may be necessary if gravy is over-thickening.  Remove from heat and serve over biscuits.

Monday, July 18, 2011

Pizza Waffles


The idea is simple. Make pizza, but instead of cooking it in the oven cook it in the waffle iron.  We tried it and we love it. 
Tips for success:
1.  Spray the waffle iron with cooking spray before each pizza
2.  This is a messy project.  Some of the toppings and dough are going to leak out.  Place your waffle iron on a cookies sheet to contain the mess. 
3.  When rolling out the pizza dough you want it to be the same height as the waffle iron and twice as wide.  You are going to fold the dough over the top to create a pizza pocket. 
4.  Be sparing with the sauce. If you add too much sauce then it leaks through the pizza dough and burns on the waffle iron. 
For this recipe you will need Pizza crust, pizza sauce, and toppings.


Pizza Crust:

1 1/4 cup hot water
2 1/2 teaspoons yeast
1 Tablespoon sugar
1 1/2 Tablespoon oil
1/2 teaspoon salt
3 cups flour

  1. Pour hot water in mixing bowl. Sprinkle yeast to dissolve. Add sugar, salt,  oil. Stir to combine
  2. Gradually add flour.  Mix well. Knead in mixer for 5 minutes.  The dough should be firm not tacky and soft to the touch.  Let dough rest in bowl for about 5 minutes.

Pizza Sauce
I really like this recipe for pizza sauce. It is from www.howdoicookwith.com and uses tomato powder.  The recipe is easy to make and tasty.  
photo credit: www.howdoicookwith.com

To Assemble:

1.  Divide Pizza dough into 5 balls.  Roll each ball into an oval.  The dough need to be the same height as the surface of the waffle iron and twice as wide. 
2.  Place the pizza crust on the waffle iron. 
3. Add sauce, cheese, and toppings.  (We especially love the freeze dried sausage)
4.  Fold the extra dough over the top to form a pocket.  Close the waffle iron and cook until crust is set (this depends on your waffle iron mine took about 4 minutes)
5. Enjoy! We loved these dipped in extra sauce or in ranch.