Tuesday, August 30, 2011

I need your help

 source: marc falardeau

I need your help.  Over the past few months I have been working really hard to make this blog better; easier to navigate, cleaner, and more users friendly.  

I am to the point where I need some feedback.  If you would take a couple of minutes and answer the following questions I would be so grateful.  You can leave your answers as a comment to this post or e-mail it to me heather@teamshelfreliance.com

Thanks
Heather

 The Questions:

1.  What are your favorite things about cookingwithmyfoodstroage.com?

2.  Have you ever recommended cookingwithmyfoodstorage.com to a friend or colleague?  How did the conversation take place? What was said?

3.  If you owned cookingwithmyfoodstorage.com what would you change about it?


Monday, August 29, 2011

Can I Make Home Made Yogurt From Freeze Dried Yogurt Bites?

Photo Source: kthread
**Update:  One of my readers told me that this post is confusing.  I'm sorry. Let me clarify.  This post is about using freeze dried yogurt bites as a starter to make home made yogurt.  If you are a little bit "granola" like I am and make your own yogurt, than it would be AWESOME to use freeze dried yogurt bites as a starter or culture to make your own yogurt. Sadly it does not work well and is not a safe  practice.  If you just want to reconstitute the yogurt bites and eat like fresh yogurt (which is how they are designed to be eaten) well that is a wonderful way to use them and totally safe.  I hope that clarifies things.


The short answer
NO, making yogurt from freeze dried fruit flavored yogurt bites does not work, and is UNSAFE.

The long answer
I have been making my own yogurt for years.  When freeze dried yogurt hit the food storage market I tried it and liked it.  Immediately I thought “I wonder if I could make my own yogurt with this as a starter?”  But I was concerned that the fruit added to the yogurt bites would somehow make the home cultured yogurt unsafe.  I decided to give it a try anyway using my tried and true yogurt recipe, substituting yogurt bites for the fresh plain yogurt.  I was hopeful that it would work.  I turned my yogurt maker on and after the appropriate time went back to check.  Sadly the yogurt did not set.  But I thought sometimes yogurt will thicken after refrigeration. So I put it in the fridge and waited.  Still no set. 


I contacted Becky Low from the Utah Nevada Dairy council.  I asked her if there was a reason you needed to use plain yogurt when culturing your own yogurt.  It turns out that there is.  Here is her reply. 


“When incubated at room temperatures the live active cultures in yogurt start growing and create the desirable yogurt taste and consistency in the new batch.  When flavors and fruit are added before the culturing process (or using flavored yogurt) it may introduce bacteria and/or enzymes into the milk which may:  1) grow at the incubation temperatures causing food spoilage and potential food safety concerns;  2) interfere with the desirable cultures and prevent the yogurt process.” 

No yogurt should not be made from fruit flavored freeze dried yogurt bites.  The yogurt will not set properly and it is potentially unsafe.  Yogurt should only be made from PLAIN yogurt.  I am unaware of any freeze dried plain yogurt on the market.  


My Recommendations:

Purchase yogurt starters from a reliable source and store them in your fridge.  I have been purchasing mine from The NewEngland Cheesemaking Supply Company.  They have a quality product, although a  little pricy.
 

Yogurt can also be made from PLAIN yogurt with live active cultures purchased from your grocery store.  Once you have made yogurt successfully you can save a start from it and culture more yogurt. 

Friday, August 26, 2011

Shout Outs: What I would be making today

I'm sick.  I hate summer colds. 

If I wasn't sick  but if I wasn't here is what I would be making today:

Pineapple Coconut Bread Pudding:  From Deals to Meals
I know I"m obsessed with all things coconut, but you have to admit that looks AMAZING. 

Aebleskivers: from Thrive Sisters

My mom makes aebleskieves with a lemon mascarpone cream filling.  YUM is all I have to say. 


No Bake Peanut Butter Cookies: from Whole Family Fare 

 I am in love with no bake cookies.  I have been wanting to make no bake peanut butter cookies for a while and this is the recipe I think I'll make (as soon as I can breath again)


What are you making today? 


Thursday, August 25, 2011

Food Storage Friday Link Party

A link party is a chance for everyone to share a favorite recipe.

Recently I have had a LOT of questions about link parties and why you would want to participate in one. 
  • If you have a blog it is a great way for you to drive traffic to your best posts. 
  • If you are a reader it is a great way to see the best of what is out there. 
I personally love to link parties, I get a lot of great ideas from other peoples posts and it is a chance to get my material in front of a new audience.  I have not hosted a link party in a while and thought I might try it again. 
If you don't have a blog and would like to add a recipe, just add it as a comment to this post. 


(hint, hint: There is a give away coming soon. One lucky commenter will randomly be chose to receive some of my favorite emergency supplies, so link up and leave a comment.)

Are yor preparing for a hurricane? Tips from around the web

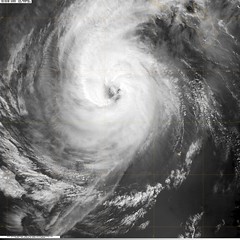
Hurricane Norbert at 2045Z on Oct 10, 2008

photo source: CoreBurn
Many of you are bracing for the upcoming storm, and even if you are not in the path of the storm this is a good time to make sure your emergency plan and supplies are up to date.

There have been a slew of great articles about how prepare and what to do.  Here is a list of the best from around the web and a tip from me. 

1.   Safe Guard Your Personal Records:  from Montclair Patch

The sum up:  Make sure you have your valuable documents (tax returns,  car titles, etc.) stored in a secure place.

My take:  I cannot overstate the importance of this.  If you have not taken steps to ensure you vital documents will be safe then do it now.  I suggest making a financial paper work binder.  Storing it in a safe place and taking it with you when you evacuate.

2.  Identify Information sources:  From CBC News Canada

The Sum Up:  Make sure you know the best information sources for your area. Remember that often in a hurricane internet and television may be out of service.

 My take:  Everyone should have an NOAA emergency radio.  I recommend the kind that has several ways to charge the battery (hand crank, solar cells, battery etc).  I also really like the kind that has an auto alert feature, this will tell you when a weather or other alert for your area has been issued.  I personally have this radio and love it. An extra bonus is you can charge your cell phone from the radio.  Nice! 

3.  Things not to do during a hurricane: From Associated Content (okay this article is an oldie but a goodie)

The Sum Up:  You are not superman and a hurricane is dangerous use your head and don't put yourself or your loved ones in danger.

My take:  It is surprising to me that every time there is a natural disaster I see you tube videos featuring people doing stupid things.  Do you remember the videos of people surfing in the Japanese tsunami?  It doesn't not take a genius to know that is a bad idea.  Be cautious and stay safe.

4.  My Tip:   Let Your People Know.

In everything I have read recently about hurricane preparedness I keep hoping I’ll see this mentioned but since none of them do I will.  You have a plan, you know what you are going to do, so let the people that care about you know in advance.  This will let your mother sleep at night and keep every member of your family from calling you ever hour.  My sister used to live in hurricane country and every time there was a forecast that the hurricane might hit her state my mom, grandmothers, and everyone else started worrying.  If you are in the path of the hurricane or even if you are sort of close.  Let your family and friends know that you have a plan and when they can expect to hear from you.  A quick e-mail will save a lot of worry for “your people.”     Here is the emergency plan that my extended family uses.  We have each family member fill it out and then print it off and store it with our emergency supplies. 
What would you add to the list? 

Sunday, August 21, 2011

Coconut Mango Lime No bake Cookies


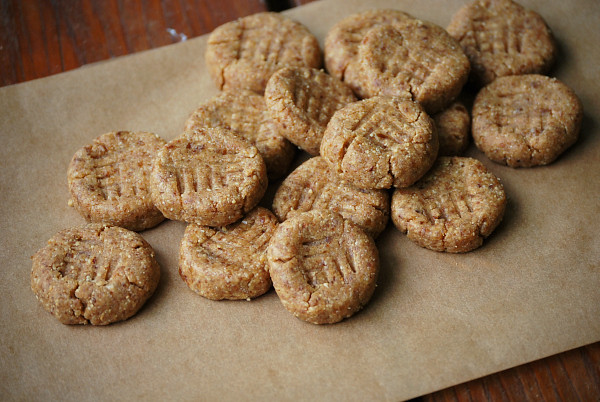
I love cookies but it is too hot to bake so recently I decided to try some no bake cookies.  Recently, I have found a bunch of raw food vegan food websites and many of them have recipes for no bake cookies.   After reading a bunch of them I decide to give it a try.  I love all things with coconut and lime in them, so I decide that a tropical cookie was the way to go.  I am so happy with this recipe.  I know the cookies aren’t much to look at but they are heavenly. They were so good I didn’t share any of them with my kids. I just ate the last one and now I wish I had more.   
This recipe is super-fast and easy and amazing. It makes about 10 cookies, and they need to refrigerate for a while, as the mangoes soften and then honey solidifies.  An hour or two in the fridge is ample.     

Coconut Mango Lime No Bake Cookies

1/2 cup freeze dried mangoes
1 cups shredded unsweetened coconut
pinch salt
1 tsp vanilla
1 tsp lime juice
1 tablespoon vegetable oil
2 tablespoons honey

In the bowl of a food processor, blend the coconut into powder.  Add dry mangoes, don't rehydrate just add them dry, and process until everything is powdered.  Add all other ingredients and process until to forms a "dough" about a minute.  Roll into balls.  Refrigerate until firm.   Yield 10 cookies

Thursday, August 18, 2011

Cheesy Pull Apart Bread


We eat a lot of cheese.  We live in a small dairy farming community and we eat a lot of cheese.  In a disaster when we would be living totally out of our food storage cheese is one of the things we would miss the most.  I have looked into and tried a couple of options to add cheese to our food storage.  I have even made cheese from my non fat dry milk. (It was a lot of work and it did not turn out that great).  Freeze Dried cheese is a great option.  But honestly it is too expensive for me to store very much of  ($38.00 for 44 servings is kind of pricy).  So I started looking into powdered cheese.  

Have you ever tried powdered cheese?  It is a pretty common food storage ingredient. It is on most of the food storage lists I’ve seen, but I was hesitant to use it.   When I first started thinking about doing this series about powdered cheese I Goggled recipes for powdered cheese, the search came up with a lot of discussion forum results and they were pretty much all in agreement. 

They all said something to the effect of “Powdered cheese is terrible!”  But after trying powdered cheese I know that powdered cheese can be excellent.  I have been surprised and pleased by how much I like powdered cheese.  I have tried a couple of brands of powdered cheese and some of them are terrible.  I know I always say it but buying quality food storage means you have quality food to eat.  With powdered cheese this is especially true.  

Of the powdered cheeses I have tried I like the THRIVE Cheese Blend (it is not really a blend it is made from cheddar cheese) and the King Arthur Vermont Cheese Powder (which is currently unavailable sorry).  Both have a clean cheddar flavor and both reconstitute to a smoothly in a cheese sauce.  The thing I like most about them is they do not taste chemically, so many of the cheese powders I have tried are really fake chemically tasting.  


Cheddar Cheese Pull-Apart Bread
I really love savory breads.  I serve this pull apart bread like I would bread sticks.   My husband always wants me to add more butter to this which would be delicious and would probably kill him. 


  • 3 1/2 cups flour
  • 2 teaspoons yeast
  • ¼ cup instant potato flakes
  • 3 tablespoons powdered milk
  • 1 tablespoon sugar
  • 1 1/4 teaspoons salt
  • 4 tablespoons soft butter
  • 2/3 cup lukewarm water
  • 1/2 cup lukewarm milk

Coating


  • 1/3 cup powder cheese
  • 3 tablespoons cornstarch
  • 2 teaspoons Italian seasoning
  • 4 tablespoons melted butter

Coating


1) Combine all of the dough ingredients in a large bowl, and mix and knead — using your hands, a stand mixer, or a bread machine set on the dough cycle — to make a soft, smooth dough.

2) Place the dough in a lightly greased container — an 8-cup measure works well here — and allow the dough to rise for 60 to 90 minutes, until it's just about doubled in bulk.

3) Gently deflate the dough, and transfer it to a lightly greased work surface.

4) Divide the dough into 32 pieces, by dividing in half, then in halves again, etc. Don't worry about making them exactly even; and don't bother to shape them into balls, unless you're totally into perfection.

5) Lightly grease a 9" deep casserole dish, or large bunt pan. Pour a generous layer of olive oil in the bottom of the pan, to coat.

6) Make the coating: whisk together the cheese powder, cornstarch, and Italian Seasoning. Put the melted butter in a small bowl. Dip each ball in the butter, then the coating, then place in the pan in a single layer; you'll need to squeeze them in.

7) Cover the pan, and allow the dough to rise till quite puffy, about 60 to 90 minutes. Towards the end of the rising time, preheat the oven to 350°F.

8) Uncover the pan. Bake the bread for 15 minutes. Tent with aluminum foil, and bake for an additional 20 minutes, until it's golden brown when you peek underneath the foil. An instant-read thermometer inserted into the middle of the center bun should register 190°F, or very close to it.

9) Remove the bread from the oven, and turn it out of the pan onto a rack. Serve warm. 

I did not develop this recipe but I have had it for a long time and can't figure out where I got it.  I have adjusted it to fit our family.  But I would love to give credit to whomever originally gave it to me.  If it was you please let me know.