Wednesday, August 17, 2011

Powdered Cheese Macaroni and Cheese


  Or

Our Mac and Cheese Dilemma:  
At our house my kids love the macaroni and cheese that comes in the blue box.  The adults at our house would prefer something more grown up.  Honestly if I never eat Kraft macaroni and cheese again I will be happy.

I have heard great things about the Shelf Reliance Cheese Powder  which they call “Cheese Blend” and how it makes amazing macaroni and cheese. Honestly I was skeptical.  How good could powdered cheese be?   It turns out it is pretty good.

When I was making it I was surprise by how it smelled like cheese and as the sauce came together how much it look like real cheese sauce (not the Kraft powdered kind).

So I fed it to my family.  And they loved it.  I thought the kids would revolt because it is not the fake orange color of Kraft, and it the sauce is a little thicker and tastes of cheddar cheese.
But my kids loved it. My 6 year old said “This is just like IKEA macaroni and cheese”
Since my kids love it I was not sure I was going to (remember my hatred of the boxed variety), but I was surprised that I liked it.  It is not gourmet or anything but it was pleasant.  My husband liked it, and the kids liked it.  It is a keeper for our family.

Because the powdered cheese had made good plain mac and cheese I decided to use it in my favorite homemade mac and cheese recipe.  Usually I use shredded sharp cheddar in the recipe.  I like how it turned out.  The cheese flavor was not as intense as normal but I liked it.  If you want a stronger cheese taste try adding 1/4 cup more powdered cheese. 


Tips for success:

o    Both of these recipes make a little more than a box of mac and cheese, this recipe does not make a huge amount ( they both make a 9 x9 pan full) so if you have a large group to feed you probably want to double it. .


o    I always add veggies to my Mac and Cheese, my kids will eat most anything if it is covered in cheese sauce so I try to get a few more servings of veggies in by adding broccoli or any other veggie I think of.  If your kids are weirded out by green stuff in their macaroni try adding freeze dried cauliflower instead.  It is white and soft and most kids don’t notice it.

Kids Macaroni and Cheese from Powdered Cheese

This recipe is based off of the  Cheese Blend Macaroni recipe by Natalie Riley.

1⁄2 c thrive cheese blend
1⁄4 c thrive butter powder or 6 tbsp butter
6 T thrive powdered milk, prepared
2 cups uncooked cooked  elbow macaroni  plus water for cooking
2 cups freeze dried broccoli  (optional)

1.    Bring 2 quarts of water to a boil.  Add macaroni.  Boil 5 minutes.  Add freeze dried broccoli.  Cook another 3 minutes or until the macaroni and broccoli are tender.  Drain.

2.    To make the cheese sauce:  combine cheese blend, butter or butter powder, and milk in a saucepan over medium heat.   Stir and heat until sauce is thick and bubbly.

3.    Pour sauce over cooked macaroni and broccoli, stirring through until noodles are coated.  Serve hot.

Adult Macaroni and Cheese 
from Powdered Cheese


Bread Crumb Topping
2 tablespoons butter, melted
1 cup Italian Bread Crumbs
Pinch salt

Creamy Macaroni and Cheese
2         large eggs (2 tablespoons powdered eggs plus ¼ cup water)
1 can evaporated milk
¼ teaspoon hot red pepper sauce
2 teaspoons salt
¼ teaspoon pepper
1 teaspoon dry mustard
2 cups macaroni (Approximately 1/2 pound)
½  cup butter, divided
½ cup THRIVE Cheese Blend (powdered cheese)

1.       For Bread Crumb Topping: Combine melted butter and bread crumbs; tossing to coat. Season with salt and set aside.
2.       For Mac and Cheese:  Mix eggs, evaporated milk, pepper sauce, salt, pepper, mustard and ¼ cup melted butter in a small bowl. Stir well to combine, leaving no lumps. 
3.       Boil 2 quarts water; add macaroni and cooking until tender but still firm.  Do not overcook.  Drain and toss with ¼ cup butter.
4.       Place noodles in greased 9 by 9 baking dish pour sauce over and toss to coat.  Sprinkle bread crumbs over the top.
5.       Bake at 350 for 15 minutes.  Crumb topping should be browned. 

Tuesday, August 16, 2011

Nachos Made From Powdered Cheese


Photo source: jeffreyw

We love nachos.  In fact we have two family traditions that feature nachos.  We always eat nachos on Christmas Eve and during “Nacho Who”  .  For those that haven’t ever head of Nacho Who, it is because we made it up.  We each nachos and watch the BBCs Doctor Who.  Wonderful food, wonderful show.    

What could be better?  


Okay if David Tennant came back as the doctor that would be better.  Don't get me wrong I like Matthew Smith, but David Tennant is well the Doctor.

I used to buy a number 10 can of nacho cheese from Sam’s.  But it is only the two of us eating nachos and it always went bad in my fridge before we could eat very much of it. So when I realsized I could make nacho cheese from powdered cheese I was so excited. 

Recipe Tips: 
  • You can make these nachos as spicy or as mild as you want.  Use whatever temperature of chilies you want.  If I'm making them for the kids than I use mild green chilies, if I'm making it for my husband I use jalapenos.
  • Make sure to completely dissolve the cornstarch in the cold milk before you start heating it.  No one likes lumpy nacho cheese.

Nacho Who Nachos
Nacho Cheese:
1⁄2 c thrive cheese blend
1⁄4 c thrive butter powder or 6 tbsp. butter
6 T milk
1 tablespoons cornstarch
1 can diced green chills 

To serve:
Tortilla Chips
Taco TVP, reconstituted (just put some TVP in a bowl and over with hot water let it sit until the water is observed, and it is ready to eat)
Sour Cream
Salsa
Sliced olives
Sliced green onions
Diced tomatoes
Sliced Jalapenos (optional)

To make the nacho cheese: 
Combine cheese blend, butter or butter powder, cornstarch and cold milk in a saucepan.  Stir until well combined before heating.  Cook over medium heat until thick and bubbly.   

To assemble nachos:  Place tortilla chips on a plate and top with nacho cheese and your favorite toppings.

You might be interested in these food storage salsa recipes: 

Friday, August 12, 2011

Apricot Pie Bars


I have been making all things apricot over the past two weeks.  Apricots are my most favorite fruit to preserve. They are easy (no pealing) and usually I can find someone who will give me the apricots off their tree so they are free.  This year my cousin-in-law offered the apricots off her tree.  We picked and picked and picked and ended up with tons of awesome apricots.  I’m almost finished juicing, jamming and drying them.   We have also been adding them to everything we are eating. This is my favorite recipe from this year.  
Powdered Butter to the rescue:
When I was making this recipe last night I was planning on using fresh butter. But I found I only had one stick, and the recipe calls for three.  So being the food storage girl that I am, I used the one stick and then made up the difference with powdered butter.  This is my favorite way to use powdered butter.  I find that using part fresh butter and part powdered butter yields awesome results.   When we ate these luscious bars no one could tell I did not use all fresh butter and I did not have to run to the store to buy some more butter. 

Apricot Pie Bars
adapted from Rebecca Rather,
The Pastry Queen

Crust and Topping
  • 3 cups all-purpose flour
  • 1 1/2 cups sugar
  • 1/4 tsp salt
  • 1 1/2 cups (3 sticks) unsalted butter, chilled  ( I used ½ cup butter and 1 cup butter powder)
Fruit Filling
  • 4 Tablespoons egg powder plus 8 T water (or  4 fresh eggs)
  • 3 cups sugar
  • 1 cup sour cream powder plus ½ cup hot water (or 1 cup sour cream)
  • 3/4 cup flour
  • pinch salt
  • 2  cups apricot puree
  • ¾ cup quick tapioca
To make the crust and topping, preheat the oven to 350 degrees.  Grease a 9x13 inch baking pan.

Combine the flour, sugar, butter powder and salt in the bowl of a food processor.  Pulse a few times to mix.  Cut the butter into 1/2-inch cubes, and add to the flour mixture.  Process until the butter is evenly distributed but the mixture is still crumbly, 30-60 seconds.

Reserve 1 1/2 cups of the mixture to use as the topping.  Press the remaining mixture into the bottom of the pan, and bake 12-15 minutes.  Cool for at least 10 minutes.

To make the filling, beat the sour cream powder and the hot water in a large bowl until smooth.  Add egg powder, water, sugar, flour, salt, and mix until combine.  Gently fold in apricot puree, sugar, and tapioca.  Spoon the mixture over the crust.  Sprinkle the remaining flour mixture evenly over the filling, and bake 45 to 55 minutes.

Cool at least 1 hour before cutting into bars, or scoop out of the pan to serve cobbler-style.

Thursday, August 11, 2011

Cinnamon Sugar Doughnuts


A couple of years ago I saw an article in Family Circle magazine about baking doughnuts in the oven.  I had never even thought of it.  We love doughnuts but I'm not up to deep frying very often so we mostly never make them.  Well this year for our anniversary my husband gave me a set of doughnuts pans.  We have tried a bunch of recipes and I have found a couple of things that are critical when baking doughnuts.

How to make awesome baked doughnuts

1.       Do not overfill the doughnut pan; fill each doughnut mold 2/3rds full.  Even if you have a little extra batter and you are thinking it won’t hurt.  It will. Don’t do it. 
2.      Use a zip lock bag to fill the doughnut molds.  Spoon batter into a gallon Ziploc bag, squeeze the air out and seal.  Using scissors snip one of the bottom corners to create a pastry bag.  Pipe the batter into the prepared doughnut pans.     This is an easy and relatively mess free way to ensure even filling of the doughnut molds.
3.      Batter should be thick.  These are cake doughnuts so in my mind I thought the batter should be like cake batter, I was wrong.  It should be thick almost like sugar cookie dough.
4.      Doughnuts don’t take very long to bake.  The hole in the middle really cuts down on baking time so watch them carefully. 
5.      To add toppings(cinnamon sugar, nuts, coconut, sprinkles) to doughnuts you either need to frost them or butter them.  Then the toppings will stick to the frosting or the butter.  


 Baked Cinnamon Sugar Doughnuts

     2 cups flour
     2/3 cup sugar
     2 1/2 teaspoons baking powder
     1/2 teaspoon salt
     1/4 teaspoon nutmeg
     1 large egg  (1 tablespoon powder eggs plus 2 tablespoons water)
     1 cup plus 2 tablespoons milk
     6 tablespoons unsalted butter, melted and slightly cooled
     1 teaspoon vanilla extract

    Cinnamon-Sugar Topping
     1/2 cup sugar
     1/2 teaspoon cinnamon
     2 tablespoons unsalted butter, melted and slightly cooled

Heat the oven to 375°.  Spry the doughnut pans with cooking spray and set aside. Measure the flour, sugar, baking powder, salt, and nutmeg into a large mixing bowl and combine them with a whisk. In a medium-size bowl, whisk the egg until it's frothy. Blend in the milk, melted butter, and vanilla extract.

Make a well in the dry ingredients and pour in the liquid mixture. Using a wooden spoon, mix the batter just until it's evenly blended.  The batter should be thick.  Spoon batter into a gallon Ziploc bag, squeeze the air out and seal.  Using scissors snip one of the bottom corners to create a pastry bag.  Pipe the batter into the prepared doughnut pans.  Do not over fill, fill each about two-thirds full.  Bake for 15 minutes.

Cool enough to handle, about 5 minutes, then remove them from the cups.   Mix the sugar and the cinnamon in a small bowl. Melt the butter and transfer it to a separate small bowl. Set both bowls next to the doughnuts. Working one at a time, quickly dip the tops in the melted butter and then in the cinnamon sugar, rolling each in all directions to cover the entire top. If you'd like more topping, roll them in the cinnamon sugar for a second time while they're still warm. Serve immediately. Makes 6 large doughnuts.

I added this post to Melt in your Mouth Monday.

Wednesday, August 3, 2011

An apology and how to back up your blog


I just wanted to apologies to all of the subscribers out there.  Last night this blog suffered a cataclysmic event.  I do back up my blog and consequently got most everything back up.  But then this morning while reading my Google Reader I realized it had sent all of my posts out to subscribers again. EEEK!   I’m so sorry.  I hope you don’t hate me for filling up your reader or inbox with posts you have already read. 

A note to bloggers:  If you are not backing up your blog you should do it right now. It is easy and sometime you are going to need it. I recommend backing it up once a week. 

Here is how to back up your blog if you use blogger:

To back up your template:
1.        Click Design
2.       Click Edit in HTML
3.       Click Download Full Template
4.       Choose Save File and click okay

To back up your content:
1.       Settings
2.       Export blog
3.       Download Blog
4.       Choose Save File and click okay

Tuesday, August 2, 2011

Shout Outs: Home Canning Jam


These days I am doing a lot of canning.  Mostly jam.  I love to make jam.  As the season progresses I will move on to other items but for now jam it is.  So far I have made strawberry rhubarb and Peach Melba jam. But today I am going to pick apricots so tonight will be apricot jam.  I could write an entire post about how fabulous I think apricot jam is but instead I will pass on some of my favorite home canning resources. 

If you are also a canner and jam maker, you might be interested in these websites:
1.  National  Center For Home Food Preservation

The website has a ton of info on home food preservation including; canning, freezing, drying, curing fermenting pickling, and making jam.   The site offers current researched based recipes, and information, which the home economics teacher in me loves.  Safe tested recipes that are where I choose recipes from.

2.  Freshpreserving.com

This is the Ball/Kerr website.  It has a lot of great features, including a pectin calculator to help you determine what kind of pectin is right for your jam.  I also really like the recipe explorer.  It allows you to choose a main ingredient, preserving method and level of ease. Than it matches recipes to your requirements.  I love this because sometimes I have more apricots than I need to jam so it is nice to have some alternative recipes. 

3.  Oregon State Extension Food Preservation

No matter where you live the local extension office is a huge help with home canning.  Please check yours out.  Many offer canning updates, pressure caner testing, acidity testing and other great service to ensure you are preserving tasty and safe food.  The online resource I like the best is the Oregon State University Extension page.  It is easy to use and find info on. 

A couple of fun canning ideas:
 

Canning Lid Labels with a Retro Spin (this link will download the Pdf) from sweet preservation.com


Canning Jar Calendar (link will download the pdf) from www.sweetpreservation.com

Monday, August 1, 2011

Emergency Supplies: Sparkie Fire Starter Review

There are a few emergency supplies that I love.  They are all small and inexpensive making great additions to a 72 hour kit.   Recently my husband Matt went on a weeklong backpacking trip with the Boy Scouts. As he was getting ready he asked "Would it be okay if I took your Shelf Reliance stuff?  It would be awesome to test out."  He ended up taking all of the emergency supplies I usually take to parties and I thought you might be interested in what he has to say.  Here is his first post about his experiences: 


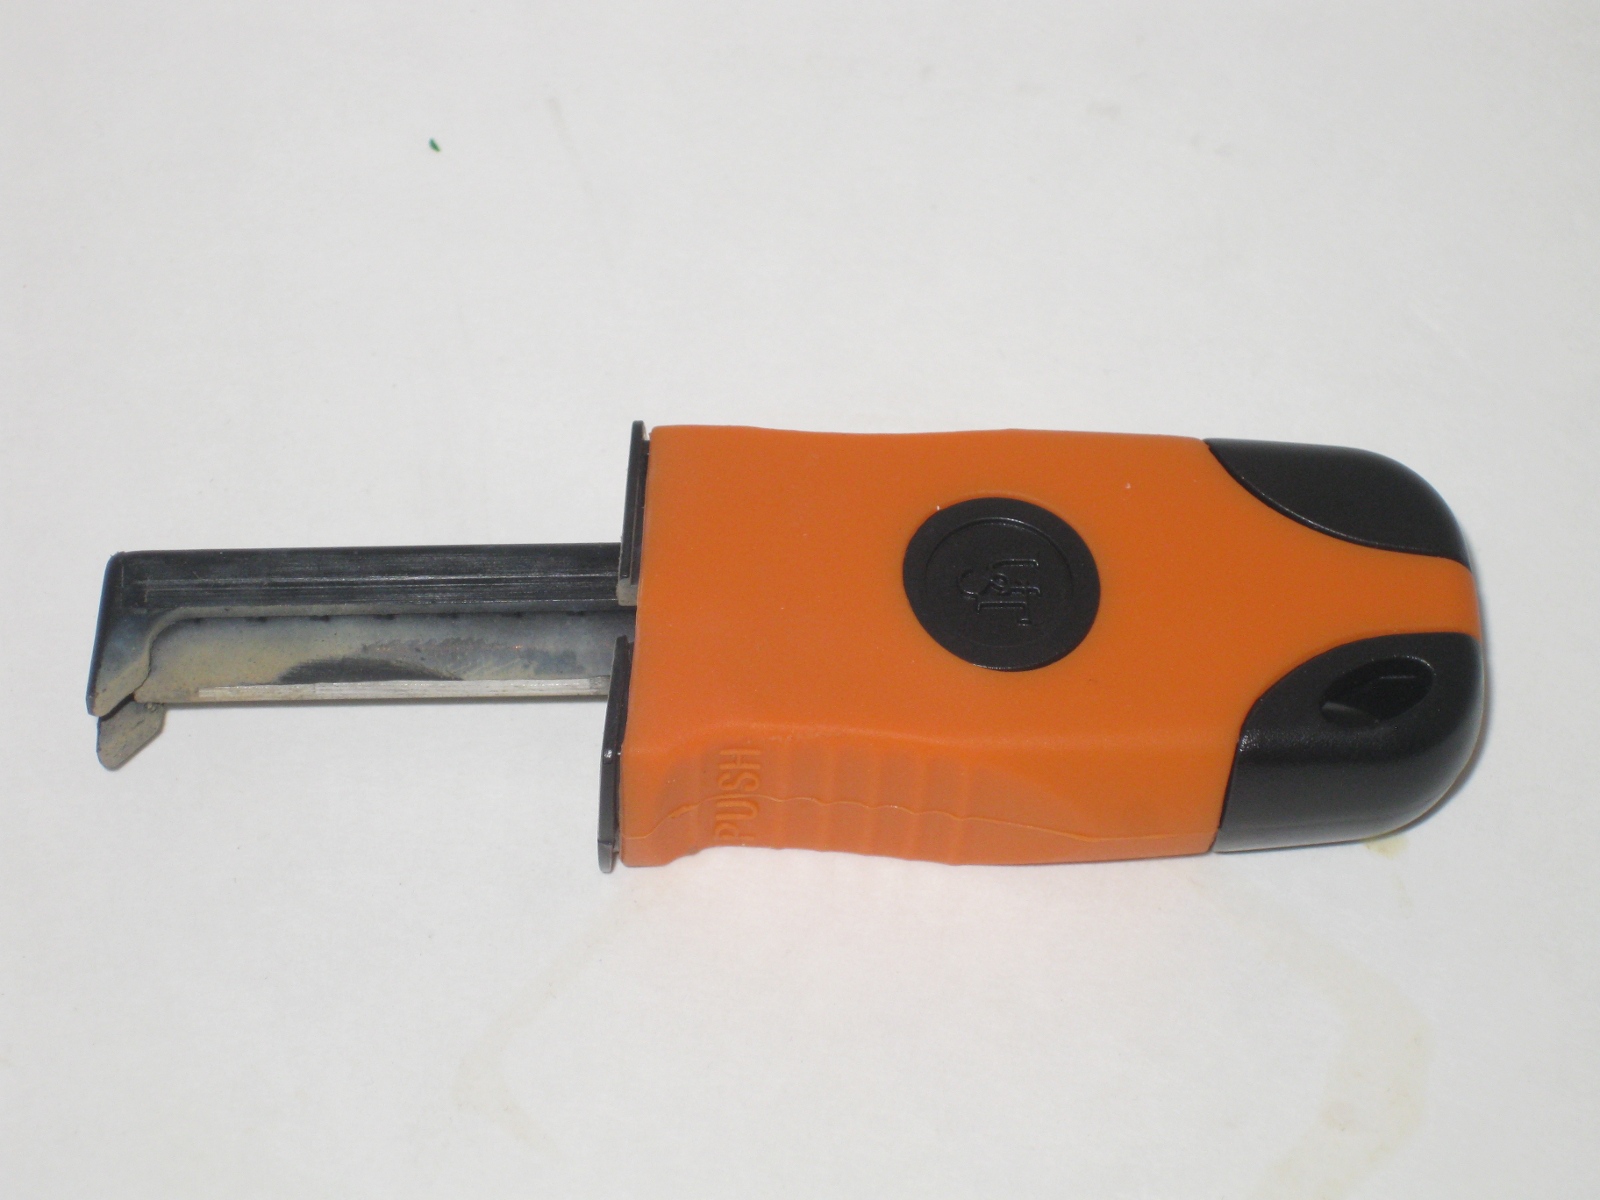
    Before I went backpacking with the Boy Scouts last month, I raided Heather’s demo products that she usually takes to parties.  One of the things I grabbed is the Sparkie Fire Starter.  I was looking for something to replace a magnesium bar.  After playing with the Sparkie, I don’t ever want to use a magnesium bar again.


    The Sparkie is a small, lightweight flint and steel syle fire starter.  The striker is built into the handle and it sparks as you push the steel back into the handle.  You can either push against a hard flat surface (rock with tinder on it), or you can hold the Sparkie in your hand and push the steel in with your fingers.  Both methods will give you a fantastic shower of sparks.
The Sparkie is the best flint style fire starter I have ever seen.  I have to clarify that because we were in Teton back country, I never actually started a fire with the Sparkie.  After watching the size of the sparks though; I have no doubt that it would be significantly easier than with any of the competing products I have used.


Pros:
  • Amazing sparks
  • Easy to use, even 1 handed

Cons:
  • Hard to release when stored in handle
If you are interested in the Sparkie Fires Starter you can check it out here: http://homeparties.shelfreliance.com/sparkie-fire-starter.html